Difficulty: Intermediate
It would be misleading to say that your choice of orchestral sample library plays no part in determining the quality of orchestral sound you can produce as a MIDI film or game composer. An industry-standard sample library will, of course, provide you with phenomenally convincing sounds — sounds which, in the right hands, are indistinguishable from a live orchestra.
However, if you’re on a tight budget, all is not lost. There are many tips and tricks to getting the most out of the library you currently have. One way you can achieve this is with the judicious use of volume automation.
In the following tutorial, I’ll be discussing three ways you can use volume automation to impart life and realism to your virtual instruments. I’m going to be assuming you already know the basics of working with the automation features in the DAW of your choice. Let’s get right into it.
1. Manage Attacks
Of the four elements of an ADSR envelope, the attack is perhaps the most crucial in the identification of an instrument. In fact, you’d be surprised how similar an oboe and a violin sound in timbre when you deprive them of their attacks. Fascinating experiments on this topic have taken place.
Taking this knowledge to the next level, we can manage the attacks of our orchestral instruments to completely alter the feeling of a sample.
One of the most common weaknesses of less expensive sample libraries is that their attacks are far too short. The reasoning for this is not wholly unjustified; after all, a shorter attack makes inputting notes with a MIDI sequencer a lot easier, and it also ensures that quantizing remains effective.
Unfortunately, these short attacks are not an accurate representation of a real instrument. As a violinist bows their instrument, the sound does not immediately begin emanating from it at full volume. Therefore, in order to create a convincing violin sound we must replicate this attack.
The most obvious thing to do here would be to change the attack settings in the sample library, but this isn’t always possible and it doesn’t give as good quality results as a manual approach.
The next most logical step would be to use automation to add a fade-in, as shown in Image A. This provides a limited improvement, but it still leaves much to be desired.
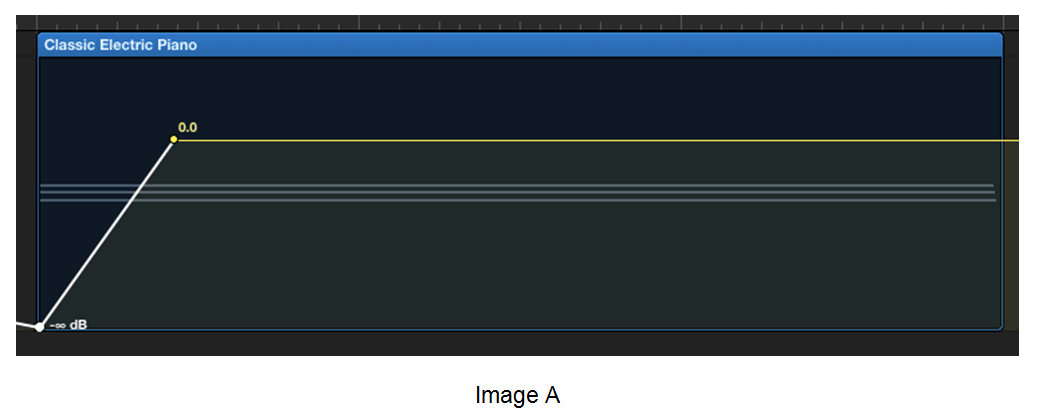
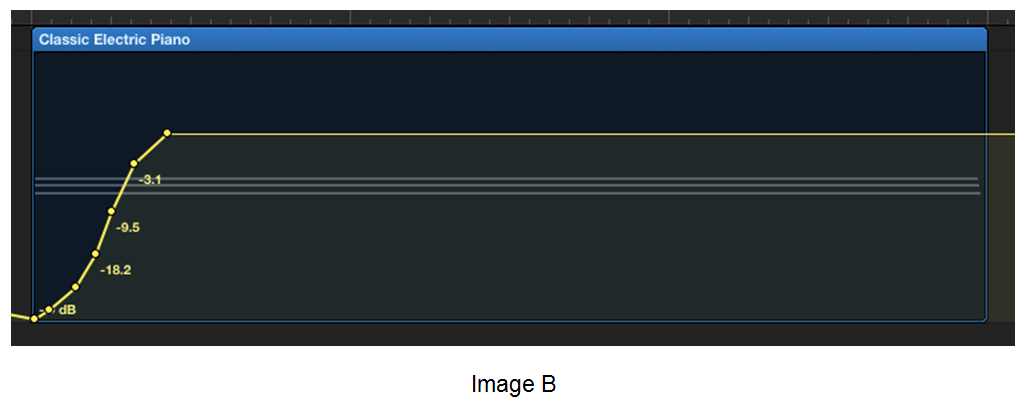
Try to make your automated volume attacks more detailed, as in Image B. In the case of the violin, it’s a fluid sound that we’re after, and thus the automation lines should be equally fluid.
When working with attacks, think about how an instrument’s attack sounds in real life, and try to mimic that attack with automation. While this will take time and effort and affect the ability to quantize the notes, the results speak for themselves.
2. Blend Harmonic Shifts
Sometimes the secret to making an orchestral virtual instrument sound convincing lies not within adjusting the timbre of the instrument itself, but in making sure that the instrument is being played idiomatically. This knowledge is a necessity if you’re going to be composing for film.
You may have noticed that your chord progressions, when dispersed among your orchestral virtual instruments, sound disparate or disjointed rather than fluid and natural. This is another area where volume automation can be put to great effect: blending chords together very convincingly.
If you’re looking to create a subtle under-texture for your track (a staple usage of chord progressions), then it would normally be fair to say that these parts do not want to draw excessive attention to themselves — the focus should be on the melodic material, not the harmonic.
One of the chief ways harmony parts can draw unwanted attention to themselves is with a jagged or disjointed connection of chords. If a chord progression is poorly voiced, as in Image C, then you’ll hear the highlighted portions jump slightly as the harmony shifts.
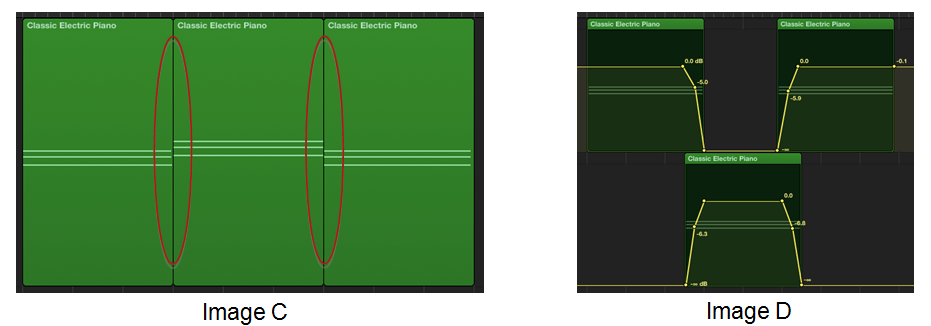
To solve this, try creating a separate track for alternate chords, and crossfade them into each other (Image D). This provides a more seamless chord progression, allowing a listener’s ears to be filled up with the texture without detracting from the melodic material.
3. Create Variation in Textures
The timbre of a texture plays a great deal into how the sound is perceived by the listener. Let’s take a string section, for example: You might decide to have a fairly close-mic’d and gritty string sound, or you might opt for a softer legato sound.
Those with more experience may decide to create a blend of the two, resulting in the best of both worlds: the tactility of one sound versus the homogeneity of the other. I’d encourage you to blend textures in such a way, as this opens up new doors for varying your sounds.
Let’s continue with the string example as I explain this technique: One sample is close and gritty, the other soft and legato. Perhaps the gritty sample is at a lower volume so that it does not become overpowering (Image E). This may create a very pleasant texture, but the texture is very constant — it doesn’t vary an awful lot. This is unlike a real orchestra, where different instruments will naturally ebb and flow in and out of the foreground.
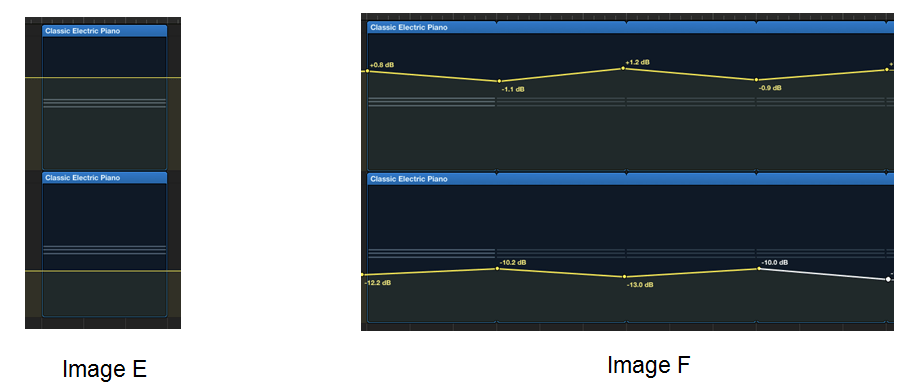
Try adjusting the volumes of each sample in relation to one another, as in Image F. For instance, you might have the gritty texture slowly increase in volume over a period of 10 seconds while the legato section decreases, temporarily creating a whole new texture. Then, over the next 10 seconds, the texture may return to normal.
Tiny changes in volume, even those of 1-2 dB, can modify a sound in such a way that the texture feels alive and dynamic — an ever-changing creature rather than a static wall of sound. Experiment with the relationships between different samples in this way to keep your audience’s subconscious listening skills on their toes.
These basic techniques can add up to make a really positive impact on your virtual orchestra’s voice. If you’re going to be composing for film or games, you can really get an edge on the competition by infusing your virtual instruments with this dose of added realism. It’s worth learning the ins and outs of your DAW’s automation feature for this very reason. The next step up is to combine this knowledge with virtual instruments from some of the best sample libraries on the market. Now go practice!
Do you have any tips or tricks for using volume automation to enhance your MIDI mockups? We’d love to hear them! And don’t forget — if you enjoyed this tutorial, share it with your friends!
Great article! Thanks for the tips.
Thanks for the feedback Taylor! Glad you liked it.
Thanks for sharing this as it is the most important thing to do with samples. Having the greatest library will not cut it if this king of care is not taken.
Gprok
Thanks for reading Gprok!
Thank you very much for your time to write. Simple but very effective things.
Good tips. Makes me realize I really need to educate myself more on VST.
Wonderful tips James. I love strings.
Looking forward to your next articles.